Category: Astrophotography
-
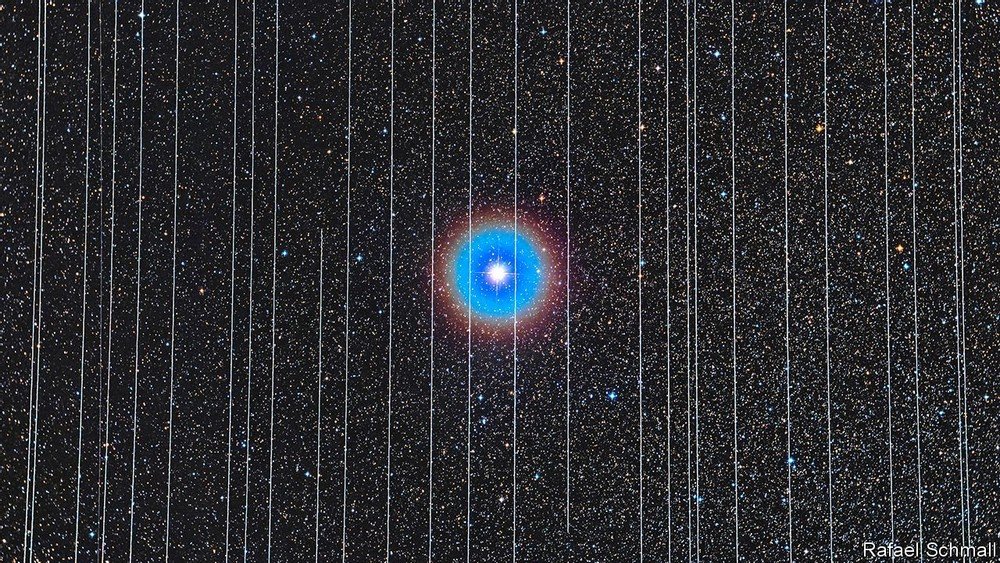
Vast satellite constellations are alarming astronomers
On may 24th 2019 a Falcon 9 rocket built by SpaceX launched 60 communication satellites into a low orbit around the Earth. That evening they appeared as a string of sunlit dots moving across the sky, many of them as bright as the brightest stars, a source of passing wonder and mystery to casual observers—and…
-
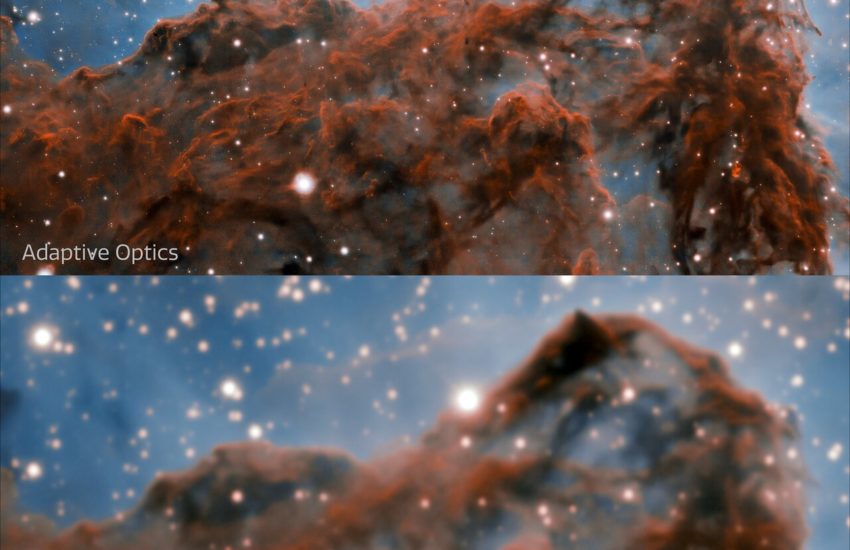
Comparison of images with and without Adaptive Optics
Adaptive optics control the surfaces of a telescope’s optic – often the main mirror – to take into account the turbulence in the Earth’s atmosphere. By doing this, the distortion caused by the “twinkling” we can even see when we look at stars with our eyes alone can be removed. This image shows a comparison…
-
Goodbye Aberration: Physicist Solves 2,000-Year-Old Optical Problem
Goodbye Aberration: Physicist Solves 2,000-Year-Old Optical Problem When you look through your viewfinder and things seem a little bit blurry or lacking definition, it’s probably because you are using an “el cheapo” lens. Source: petapixel.com/2019/07/05/goodbye-aberration-physicist-solves-2000-year-old-optical-problem/
-
Montage – Image Mosaic Software for Astronomers
Montage – Image Mosaic Software for Astronomers Montage is a toolkit for assembling Flexible Image Transport System (FITS) images into custom mosaics. Key features for end users are: Source: montage.ipac.caltech.edu/
-
Sony’s Next Full-Frame Sensor to Offer 60MP, 8K, 16-Bit RAW: Report
Sony’s Next Full-Frame Sensor to Offer 60MP, 8K, 16-Bit RAW Sony’s Next Full-Frame Sensor to Offer 60MP, 8K, 16-Bit RAW: Report Here’s a peek of what’s to come in the camera industry: Sony is reportedly getting ready to announce two new full-frame sensors, one of which will be Source: petapixel.com/2018/11/26/sonys-next-full-frame-sensor-to-offer-60mp-and-8k-report/?fbclid=IwAR2us4IWJIbC6DVSn-kmcAPlyVZdnu1hykDTdKPbXuSaoh5AdC9OImbWhTQ
-
Testing ON1 Photo RAW for Astrophotography
Testing ON1 Photo RAW for Astrophotography Can the new version of ON1 Photo RAW match Photoshop for astrophotography? The short TL;DR answer: No. But … as always, it depends. So do read on. Released in mid-November 2018, the latest v… Source: amazingsky.net/2018/11/22/testing-on1-photo-raw-for-astrophotography/
-
Testing the Sony a7III for Astrophotography
Testing the Sony a7III for Astrophotography Testing the Sony a7III for Astrophotography I put the new Sony a7III mirrorless camera through its paces for the features and functions we need to shoot the night sky. Sony’s a7III camera has enjoyed rave reviews since its introduction earli… Source: amazingsky.net/2018/05/31/testing-the-sony-a7iii-for-astrophotography/
-
Nikon D850 cooled camera for astrophotography
New: Nikon D850 cooled camera for astrophotography | Nikon Rumors New: Nikon D850 cooled camera for astrophotography | Nikon Rumors The first Nikon D850 cooled camera for astrophotography is now available for sale – a company converts a regular Nikon D850 to an Astro D850. The price is $4,950 ($1,650 over the regular D850…
-
How Juno’s Breathtaking Jupiter Images Are Made
How Juno’s Breathtaking Jupiter Images Are Made Jupiter’s sandy swirls and blue-hued poles are visible even from Earth. But the Juno spacecraft’s crisp and colourful images begin as warped and dull raw files. The fantastic finished visuals are the result of enthusiastic amateur astronomers, software developers, and artists communicating over message boards. They work together…
-

CCD versus CMOS: Which is Better?
Great explanation – make sure you click through the link and read the entire article! CCD versus CMOS: Which is Better? – Diffraction Limited We’re often asked whether CMOS or CCD sensors are better. The simple answer is, “it depends.” Both types of sensors detect light the exact same way. An incoming photon hits…
-
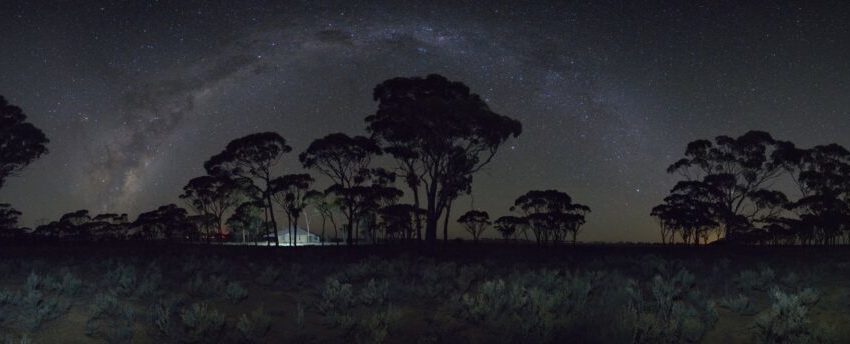
How to Photograph the Milky Way Bow
In this article, we will take a closer look at how to photograph the Milky Way bow. I wrote this guide from the point of view of a person who has largely taught himself. During the last four years, I have also had the invaluable help of a fellow night photographer. I made all the…
-
How to Focus for Night Photography
One of the biggest challenges I faced when I first became interested in night photography was getting my images in focus. I would take shot after shot each time adjusting my focus using trial and error till I got it right. Thank goodness there’s a better way! Now there’s a few different methods that I’ll…
-
The benefits of adding more subs to your stack
A good guide about the advantages of image stacking for DSLR astrophotography The benefits of adding more subs to your stack Adding multiple exposures to create a single image is one of the key elements of doing astrophotography. It enables us to get rid of bad pixels, satellite trails, noise while increasing signal to…
-
M31 pic
It’s a hot, rainy Saturday afternoon in Sydney so what the hell, there’s an old pic of M31 I took some time ago.